
8 easy steps to making a Personal Portable Mandala
- Mia Luna
- 30 mar 2024
- Tempo di lettura: 3 min

Aggiornamento: 23 apr 2024
My brand Mia Luna started back in 2014 with the simple creation of my personal mandala. The intention started with my obsession with the crystal selenite. I had known little about crystals and gemstones back then and developed an interest upon the fact that I live in a "selenite" home, which I wrote about in a past blog Selenite Secrets. In this same blog I make reference to the "birthstone" print of the Mia Luna collection Ajna Mandala. After a long time waiting, I am finally fulfilling my promise on teaching how to create a personal portable mandala.
Let's begin with why "portable"? When I say portable I am talking about a design you can take with you whether it be by wearing it or having it printed on anything you can hold in your hand. The concept of portable is a design element that traces back to various nomadic cultures , especially talisman like Hamsa Hands or deities.
Now lets delve into the easy steps of starting your first mandala "draft":
Find a quiet place where you can be alone and centered. Have some pencil and paper ready at your side after your meditation. A ruler or straight edge will also be needed to create straight lines
Create a stimulating and creative environment by lighting candles and arranging gemstones. Hold a favorite gemstone in your hand and meditate with your eyes closed for 3-11 minutes or until you get into a state of clarity. Make sure no distracting thoughts come into your mind. Meditate on what element of nature resonates with you and choose that as your inspiration for your mandala: a favorite gemstone or flower- their patterns and shapes .
Gracefully take the paper and pencil and start creating concentric circles, it doesn't matter of the circles aren't perfect as you will make everything symmetric later on Photoshop or you can even do this by hand (if you are not comfortable with software).
Divide the circle into quarters by drawing a straight line down the middle vertically then down the middle horizontally. After, create lines in between ever quarter of a circle at 20 or 45 degree angles
Now the fun part! Before you start applying designs to your grid,reflect on symbols and designs that you resonate with start with one element, for example a hummingbird, and then let your pencil flow into a design of sweeping strokes, curves, petals, leaves, whatever seems to naturally come into the flow.
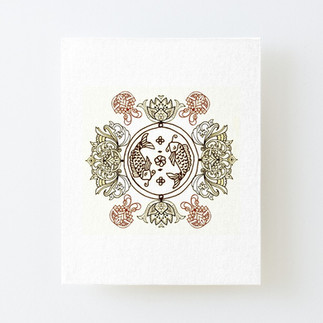
If you are struggling with design ideas you can also look on internet for elements to use in mandalas or use some of the Mia Luna mandala motifs (below) for ideas. Try and choose elements that resonate with your initial source of inspiration and practice drawing them on a separate piece of paper before placing them in your circle grid.
After you've completes your mandala you can perfect it by taking your favorite quarter and tracing it perfectly in the other three quarters of the circle. If you're software savvy you can also do this on Photoshop.
Finally it's time to ink your mandala with permanent pens in any color of your choice and make sure to use multiple colors to your liking and personality! Enjoy printing your mandala on various surfaces and you may even consider having it professional made into a silkscreen so you can use acrylic paint which has a stronger impact and range of choices that printing digitally. Let this first work of art open the possibility for other mandalas to follow!


Commenti